How to Make a Wooden Laptop Stand
Key Takeaways
- Building a wooden laptop stand is a straightforward DIY project.
- Using the right tools and materials is crucial for a professional finish.
- A wooden laptop stand can improve your workspace ergonomics.
- Customization allows you to design the stand to fit your style and needs.
Creating your own wooden laptop stand not only enhances your workspace but also adds a touch of creativity. This DIY project is perfect for both beginners and seasoned woodworkers. Let's get started on this simple yet effective project that will greatly benefit your daily routine.
Why Make a Wooden Laptop Stand?
A laptop stand elevates your screen, which can relieve neck and back strain. It also helps with air circulation around your device, preventing overheating. Besides these functional benefits, a handmade wooden stand adds a stylish flair to your workspace. Here’s what you can expect when crafting your own:
- Ergonomic Design: Increases comfort during computer usage.
- Personal Touch: Customize it to suit your personal style.
- Cost-Effective: Save money by making it yourself.
Materials Needed
Before you begin, gather the materials and tools listed below:
| Materials | Tools |
|---|---|
| 1. A piece of hardwood (oak, maple, or cherry) | 1. Saw (circular or jigsaw) |
| 2. Sandpaper (various grits) | 2. Measuring tape |
| 3. Wood glue | 3. Clamps |
| 4. Finish or wood stain | 4. Paintbrush (for applying stains) |
| 5. Felt pads (optional, for base) | 5. Drill (if needed for holes) |
Steps to Build Your Wooden Laptop Stand
- Measure and Cut: Determine the desired height and width of your stand. A typical height is 5-10 inches. Cut the wood accordingly.
- Shape the Design: Use your saw to create angles or curves as desired.
- Sand the Edges: Smooth out rough edges using sandpaper, starting from a coarse grit to fine grit.
- Assemble the Pieces: If your design has multiple parts, use wood glue and clamps to hold them together securely.
- Apply Finish: Once the glue has dried, apply a finish or wood stain to protect the wood.
- Optional Felt Pads: Attach felt pads on the base to prevent slipping and protect your desk.
Tips for Success
Beginner Section: Tips for Success
- Choose a simple design for your first project.
- Work in a well-lit area to avoid mistakes.
- Always measure twice and cut once!
- Consider exploring various wood types to find your favorite.
Recommended Products
To make your project easier, check out these recommended products:
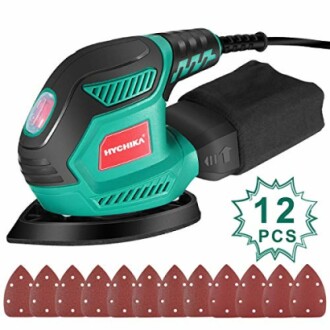
HYCHIKA Detail Sander
Compact and efficient, this sander is perfect for reaching tight spaces and achieving a polished finish on your projects.
Learn MoreEasy Handmade Toys & Puzzles
A comprehensive guide for beginners featuring 35 wood projects, this book is invaluable for honing your woodworking skills.
Learn MoreConclusion
Crafting a wooden laptop stand is a rewarding project that combines functionality with creativity. By following the steps outlined in this article, you can create a personalized piece that enhances your workspace. Don’t forget to experiment with different designs and finishes to match your style!
Further Reading
For more inspiring project ideas, explore our DIY Project Ideas category and discover a variety of creative woodworking projects.
If you need to know more about essential tools, check out our guide on best woodworking tools for beginners.
Happy woodworking!


